Remove object from photo online free: A Practical AI Workflow for Content Marketers
Follow a quick AI workflow to erase distractions from product, travel, or lifestyle shots—no Photoshop needed. Upload, select, check, and export.
 Sierra CappelenDecember 3, 2025
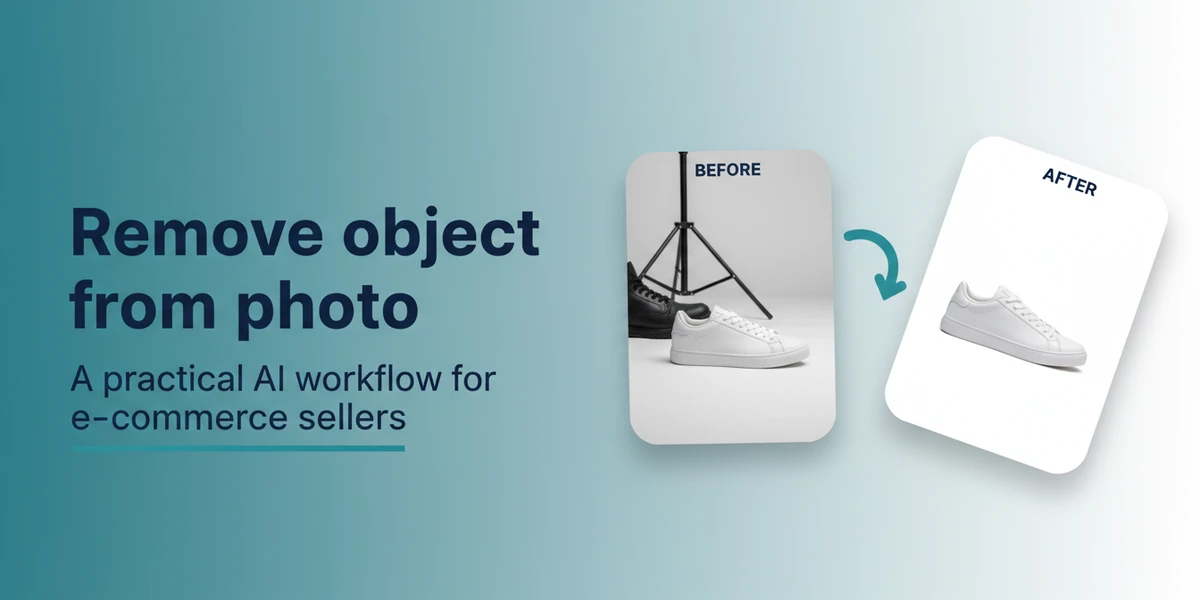
Remove Object from Photo Online Free: A Practical AI Workflow for Content Marketers
If you create content for a brand, you know the pain: a great hero shot is nearly perfect—except for a wandering tourist in the background, a stray cable, or a price sticker on the product. Waiting on a designer or opening Photoshop for a simple cleanup slows your publishing cadence across blog, social, and ads.
The good news is you no longer need heavyweight software for these fixes. Browser-based AI editors have matured. With an AI tool like Pixflux.AI, you can remove object from photo online free in minutes, keep quality high, and move on to the next deliverable. This guide shows a practical workflow you can adopt for product, travel, and lifestyle visuals—no steep learning curve required.
(See visual placement: Before-and-after comparison removing a tourist from a travel photo using an AI object remover.)
Why content marketers need fast object removal
- Product listings: Hide price tags, wires, or distracting props to meet marketplace standards and conversion-driven landing pages.
- Travel and lifestyle posts: Remove bystanders, trash bins, or signage that pulls attention from the narrative.
- Social media: Clean up clutter for on-brand, scroll-stopping posts, stories, and ads.
- UGC polishing: Elevate customer photos for emails and homepage features without compromising authenticity.
Industry trend: teams increasingly rely on fast, browser‑based AI editors for low-cost, quick turnarounds, and batch standardization across large libraries. Retail imagery standards continue to favor distraction-free product photos on Amazon, Walmart, and DTC storefronts.
Key terms, quickly explained
- Object removal: Deleting selected areas and filling them with believable background pixels.
- Inpainting: The AI technique that synthesizes missing content to match surrounding textures, colors, and lighting.
- Artifacts: Unwanted visual defects after editing—smudges, mismatched patterns, or soft edges.
- Resolution: Image detail measured in pixels. Higher resolution leaves more room for convincing inpainting and cropping.
Online vs. desktop tools: when a free AI editor is enough
Use an online AI photo editor when:
- You need fast, one-off cleanups without opening complex software.
- The background is fairly uniform—sky, walls, pavement, tabletop.
- You want simple controls (brush or lasso), quick previews, and speedy export.
Consider desktop software when:
- You’re doing advanced compositing, multi-layer masking, or retouching at print sizes.
- The image has extremely intricate patterns requiring manual, pixel-level work.
For most web visuals—blog headers, product cards, Instagram carousels—a free online object remover is more than enough.
Prep checklist before you remove objects from photos online
- Confirm usage rights: Make sure you own the photo or have permission to edit it.
- Start with the largest available image: Higher resolution improves AI inpainting.
- Duplicate your original: Keep a safe copy for future edits.
- Scan the background: Note repeating patterns (tiles, brick, fabric) and shadows—these guide selection and quality checks.
- Decide the end use: Web sizes and aspect ratios influence how much cleanup is needed.
How to remove object from photo online free: a step-by-step workflow
Follow this general sequence to get clean results consistently.
- Upload your image
- Open a browser-based AI editor and upload the original file.
- Tip: If you plan to crop, do it after removal to preserve more context for the AI.
- Select the unwanted object
- Use a brush or lasso to outline the object. Hug the edges closely.
- For hairlines or cables, use a smaller brush and zoom in.
- Feather edges (optional but helpful)
- A slight feather (1–3 px) helps blend transitions on complex backgrounds.
- Run the AI remove/inpaint action
- Let the AI fill the selection with surrounding textures and colors.
- If the result looks off, undo and try a tighter or slightly larger selection.
- Inspect key details
- Check for texture continuity, straight lines, shadows, and repeating patterns.
- If you spot artifacts, reselect a smaller area and run again.
- Patch where needed
- Tackle stubborn zones in a couple of passes rather than one big selection.
- For repeated patterns, select along the pattern lines to guide the fill.
- Save and export
- Once satisfied, export a web-ready version (details below).
(See visual placement: Close-up of brush or lasso selection around a product tag and the cleaned result with preserved shadows.)
Hands-on with Pixflux.AI: object removal in three steps
Pixflux.AI makes the process straightforward—ideal for content teams who want quick wins and consistent output across a library.
- Upload
- Open the Pixflux.AI tool page and upload your image.
- Let AI clean it
- Use the brush or lasso to mark the unwanted object, then run the AI remove.
- Preview and quickly redo any areas that need a tighter selection.
- Download
- Export the cleaned image in the format you need for web or social.
Try it now with a free online object remover workflow and see how quickly you can clear distractions from your next post.
(See visual placement: Pixflux.AI interface showing the Upload → AI process → Download three-step workflow screenshots.)
Bonus: Beyond object removal, Pixflux.AI can also swap busy backgrounds for clean e‑commerce‑ready scenes, generate on-brand backgrounds from scratch, remove watermarks you have rights to clear, enhance clarity and contrast, and clean stray elements like cables or bystanders. These actions build on the same simple, repeatable flow.
Brush or lasso selection tactics for clean edges
- Start broad, then refine: If the first pass leaves a faint outline, undo and zoom in for a tighter mask.
- Follow the light: Include the shadow if the object casts one; the AI will reconstruct the background and shadow area more naturally.
- Use smaller brushes on thin objects: Wires, straps, and hairlines benefit from 3–10 px brushes.
- Slightly over-select on busy textures: Give the AI breathing room to rebuild patterns.
- Work in passes: Complex overlaps are easier to solve with two or three smaller removals.
Quality checks: texture, shadows, and patterns
Before you export, validate these essentials:
- Texture continuity: Wood grain, pavement, grass, or fabric should flow naturally across the edited area.
- Straight lines: Floors, horizons, tiles, and brick lines must remain straight and aligned.
- Shadows and reflections: Removing an object should not leave a “ghost” shadow. If the scene expects a shadow, ensure it’s reconstructed plausibly.
- Repeating patterns: Tiled or latticed backgrounds should maintain rhythm without visible seams.
If something looks off, redo that spot with a smaller selection or extend the mask slightly to let the AI recalculate context.
Batch cleanup for product, travel, and lifestyle sets
Content teams rarely edit just one image. When you need to standardize a collection—an Amazon variant set, a lookbook, or a travel album—batch workflows save hours.
- Product series: Remove size stickers, tags, or foam supports across dozens of shots in one session. If backgrounds are inconsistent, Pixflux.AI can also replace them with a clean, brand-consistent backdrop after object removal.
- Travel sets: Clean stray people and clutter from a day’s worth of photos before selecting the hero image.
- Lifestyle campaigns: Remove small props or cables, then enhance clarity and contrast so every frame feels cohesive.
With Pixflux.AI, you can upload multiple images and process them in sequence—ideal when deadlines stack up and you need to keep quality consistent.
Legal and ethical guardrails
- Only edit photos you own or have permission to modify. Do not use removal tools to mislead or misrepresent context in ways that violate platform policies.
- Watermark and logo removal is for authorized use only. Don’t remove marks to evade licensing, attribution, or marketplace rules.
Troubleshooting common failures
- Smears or soft patches: Reselect with a tighter boundary and rerun the AI. Consider splitting the area into two passes.
- Warped lines or grids: Align your selection along grout lines or pattern seams to help the AI reconstruct geometry.
- Shadow “ghosts”: Include the shadow area in your selection so the background rebuilds cleanly.
- Complex overlaps: Remove one element at a time (e.g., cable first, then tag) rather than masking everything at once.
- Low-res outputs: Start from the highest-resolution source. If needed, use Pixflux.AI’s enhancement tools after cleanup to boost clarity.
Export for the web: format, compression, and alt text
- Format: Use WebP or JPEG for photographs. PNG is fine for graphics with transparency but heavier for photos.
- Compression: Aim for 60–80% quality in JPEG or a balanced WebP setting. Test a few levels to keep pages speedy without visible artifacts.
- Dimensions: Resize to the largest display size needed—don’t serve 5000 px images for 1200 px slots.
- Color space: Export in sRGB for consistent web rendering.
- Alt text: Write descriptive, keyword-relevant alt text that reflects the final image (“Stainless steel bottle on white tabletop after removing price tag”).
- File naming: Use semantic names that aid SEO and asset management (e.g., brand-product-color-angle.jpg).
AI online tools vs. traditional methods
- Time-to-publish: Browser-based AI tools provide instant results—no project files or complex layer stacks to manage. Photoshop is powerful but slower for quick object removals.
- Learning curve: A brush-and-preview workflow is easy for non-designers. Desktop suites require deeper skills to master masking and retouching.
- Batch efficiency: Online tools help teams clear dozens of images in a single sitting without heavy setup. Outsourcing adds waiting time and feedback loops.
- Cross-team adaptability: Anyone on the content team can jump in, make a quick cleanup, and keep campaigns moving—no specialized software seats required.
If you’re producing daily visuals for web and social, the speed advantage is compelling. For advanced composites or print-grade retouching, pair online AI edits with pro software when needed.
Conclusion and next steps
Clean visuals lift click-through rates, product trust, and overall brand polish. With AI inpainting now excellent at fine textures and repeating patterns, most everyday cleanups are just minutes away in your browser. Pixflux.AI keeps the workflow simple—upload, mark, preview, download—and extends naturally to background edits, watermark cleanup (with permission), and image enhancement when your campaign needs more than object removal.
Ready to tidy your next post? Open Pixflux.AI and remove unwanted objects from photos online to ship sharper content, faster.


