Watermark Remover for Content Creators Refresh Owned Images for New Campaigns
Own the rights? Clean old watermarks and promo tags, batch-refresh your archive, and ship polished visuals for your next campaign—fast and on-brand.
 Emily CremerApril 9, 2026
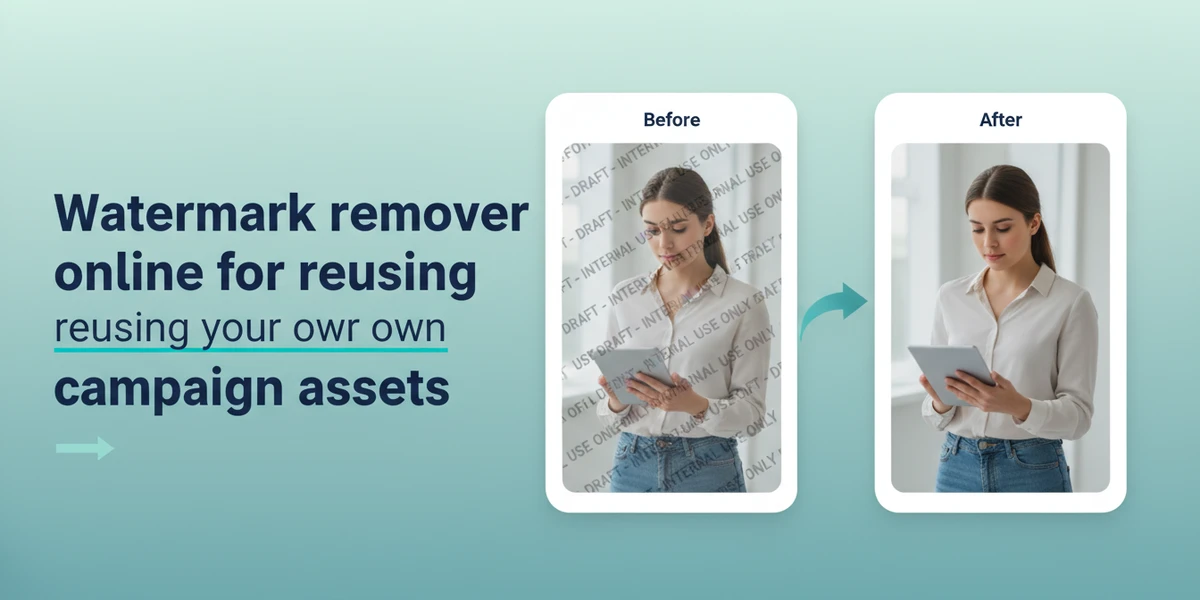
Watermark Remover for Content Creators: Refresh Owned Images for New Campaigns
Ever looked at a folder of your best lifestyle shots and thought, “If only those old promo tags and proof marks weren’t there, I could reuse all of this for next week’s drop”? Most creators and brand teams sit on months (or years) of strong visuals—product flats, UGC, behind-the-scenes, hero lifestyle frames—that are perfect for new social posts, landing pages, and seasonal refreshes. The roadblock: outdated watermarks, internal proof stamps, and seasonal stickers that no longer fit the story.
Good news: with a rights-first approach and the right AI watermark remover, you can clean up those owned visuals in minutes and bring them back into rotation. As evergreen content repurposing becomes a standard way to cut production time and costs, a streamlined watermark remover can turn your archive into a high-ROI asset library.
(See image: Before–after comparison of a lifestyle image where an outdated promo tag and proof mark are removed cleanly)
Why cleanup comes first when repurposing visuals
Repurposing starts with visual hygiene. Old “Spring Sale,” “Draft,” or “Sample” labels distract from your new message and can undermine trust. Clearing them first helps you:
- Keep the creative consistent across channels (Instagram, TikTok, email headers, storefront banners).
- Prevent mixed messages (e.g., last season’s promo appearing in a new launch).
- Maintain compliance (no internal marks, no confusing claims in co-branded collaborations).
Creators and marketers are now formalizing asset governance: tracking usage rights, expiration dates, and placements. A clean master image—free of outdated labels—becomes the reliable base for all future crops, captions, and overlays.
Rights-first checklist before you remove any watermark or proof mark
Start with permissions. Cleaning your own assets is typically fine—but confirm the details:
- You own the image or have written permission to edit it.
- Your photographer, model, and location releases cover re-edits for the planned channels.
- Co-branded or affiliate content allows removal of partner logos or internal proofs.
- Platform policies aren’t violated by modified imagery or claims.
- Keep originals archived with filenames and notes about what was changed and when.
Compliance reminder: Always remove watermarks, logos, or text only from images you own or are authorized to edit. Do not use watermark removal to infringe copyrights or bypass platform rules.
How watermark removers work: inpainting, content-aware fill, and AI object removal
Modern watermark remover tools typically blend three capabilities:
- Inpainting: The algorithm “paints over” the marked area using nearby pixels and textures.
- Content-aware fill: The tool analyzes patterns (fabric weave, wood grain, skin tone transitions) to reconstruct hidden details.
- AI object removal: For larger or complex marks, AI learns context and replaces the area with plausible background content, preserving shadows and lighting.
Result quality depends on the mark’s size, opacity, and background complexity. Transparent diagonals across an image take more finesse than a small rectangular sticker on a plain wall—but advanced AI tools handle both with high accuracy.
Choosing a watermark remover: online tools vs desktop editors
Most creators want speed without sacrificing quality. Here’s how to think about your options:
- Online AI tools
- Pros: Minimal learning curve, quick results, works from any browser, strong default models for labels, promo tags, and stray text. Great for one-offs and batch cleanups.
- Consider: Needs an internet connection; export settings should match your target platform specs.
- Desktop editors (e.g., pro photo software)
- Pros: Granular control with advanced masking and frequency separation; robust layer workflows.
- Consider: Steeper learning curve; more time per image; batch work can be slower unless heavily templated.
For most creator marketing tasks—refreshing owned visuals at speed—an online AI watermark remover strikes the best balance between quality, ease, and throughput.
Step-by-step with Pixflux.AI: remove outdated promo tags and internal proofs
Pixflux.AI streamlines the cleanup workflow so you can move fast from archive to publish. Here’s the quick 3-step process to remove watermarks from images:
- Upload your original image
- Drag and drop the file you want to refresh—lifestyle shots, product photos, or UGC.
- Let the AI process the watermark or tag
- Select the watermark remover tool, highlight the outdated label, proof stamp, or sticker, and run the AI cleanup.
- Download the cleaned result
- Preview the fix, make small refinements if needed, then export the final image in your preferred format.
Tip: Work from the highest-resolution version you have. The more detail the algorithm sees, the more natural the reconstruction will look.
(See image: Pixflux.AI interface showing the three-step flow: upload → AI process → download, focused on the watermark remover tool)
Batch-refresh archived images for seasonal campaigns using Pixflux.AI
Seasonal refreshes and multi-channel drops are where batch processing pays off. Pixflux.AI supports handling multiple images in one go, helping you turn a folder of “almost perfect” shots into a ready-to-publish collection:
- Open the Pixflux.AI watermark remover tool
- Upload a set of images with similar tags or proof marks (e.g., last year’s holiday collection)
- Choose the watermark remover and apply it to the target area per image
- Preview the set; quickly fine-tune any edge cases where backgrounds are complex
- Download your refreshed batch for your campaign folders
(See image: Grid of batch-processed archived product shots with promo labels removed and subtle enhancements applied)
Pro tip for sets: Group images by background style (studio white, wood table, street scene). Consistent backgrounds lead to more uniform AI fill and faster QC.
Quality control after watermark removal: edges, textures, lighting continuity
A good cleanup is invisible. Before you ship:
- Edges: Zoom to 200–300% where the mark used to be. Look for halos or soft edges along contrasting lines (e.g., product rims, typography edges).
- Textures: Ensure repeating patterns (fabric, brick, grain) are continuous and not blurred or duplicated unnaturally.
- Lighting: Check that highlights and shadows remain coherent. If the removed area was near a specular highlight, verify it matches the rest of the surface.
If you notice artifacts, run a second light pass on just the trouble spot or use a subtle clone/retouch for micro-corrections.
Enhance and finalize: subtle upgrades that make repurposed images pop
After watermark removal, finalize the image so it holds up across formats:
- AI photo enhancer: Improve clarity, contrast, and micro-detail while protecting skin tones and brand colors. Pixflux.AI includes photo enhancement that pairs well with cleanups.
- Background tweaks: If an older shot feels dated, try a mild background cleanup—soften distractions, remove stray objects, or refresh with a simple on-brand texture. Pixflux.AI can remove unwanted objects and adjust or regenerate a clean, campaign-ready backdrop.
- Channel-ready crops: Set up aspect ratios for Instagram (1:1), TikTok/Reels (9:16), and web banners (various wides). Keep safe areas for overlays and CTAs.
- Color continuity: Align with current brand palette or seasonal tones. Slight hue shifts across a set can make a campaign feel cohesive.
Compliance note: When removing or replacing backgrounds in co-branded content, confirm partner guidelines for logo placement, disclaimers, or required credits.
Compliance and attribution: co-branded assets, disclaimers, and credit duties
- Co-branded rules: Some partners require their logo to remain visible or be placed in a specific corner. If you removed old partner marks, re-add approved versions in compliant positions.
- Disclaimers: For regulated categories (finance, health, promotions), confirm that updated visuals still meet disclosure and claim requirements.
- Creator credits: If your agreement specifies credit in captions or on-page, keep that intact even after visual edits.
Always document the changes you make and store both the original and final files. That audit trail can save time during approvals or partner reviews.
Metrics and mini case studies: why cleaned visuals outperform
A freshly cleaned image can lift performance simply by removing noise:
- Case A: Lifestyle flat-lay set had internal “Sample” stickers. After removal and light enhancement, click-throughs on a landing page hero rose as visitors focused on the product, not the sticker.
- Case B: Last year’s promo shots recycled for a new seasonal drop. Labels removed, tones updated, and a subtle background refresh yielded higher dwell time on product detail pages.
- Case C: Social carousel with outdated “Sale” badges replaced by clean product frames. Engagement improved as the message matched the current storyline.
Track performance with a simple naming convention (e.g., “IMG_4234_cleanup_v2”) and UTM-tagged placements. Compare CTR, saves, and time-on-page between the archived and the refreshed versions to quantify the lift.
AI tools vs traditional methods: time, learning curve, and scale
- Time to value
- AI online tool: Minutes per image; batches handled quickly.
- Traditional desktop: Powerful but slower for repetitive cleanup unless you’re an expert.
- Outsourcing: Can be high quality, but adds back-and-forth and lead time.
- Learning curve
- AI online tool: Intuitive selection and process—ideal for creators and marketers.
- Traditional desktop: Requires masking, cloning, and retouch know-how.
- Outsourcing: Minimal learning, but less control over iterations.
- Batch efficiency
- AI online tool: Great for processing entire collections before seasonal launches.
- Traditional desktop: Batch actions possible but require setup; edge cases still manual.
- Outsourcing: Batching is feasible but can be costly.
For most creator marketing teams, an online workflow like Pixflux.AI hits the sweet spot: strong results, fast turnarounds, and easy adoption across non-design roles.
FAQ: Watermark remover and content repurposing for creators
Is it legal to remove a watermark from my images?
Yes, if you own the image or have explicit permission to edit it. Always verify contracts with photographers, models, and partners. For co-branded work, confirm whether logos must remain or be re-applied in approved placements. Never use watermark removal to edit images you don’t have rights to modify.
Will removing a watermark reduce image quality?
No, a good AI watermark remover preserves quality while reconstructing the background. If you start with high-resolution files, modern inpainting and content-aware fill can recreate textures and lighting convincingly. Inspect edges at 200–300% zoom and run a second micro-pass if you notice artifacts.
Can I batch process multiple images at once?
Yes, batch processing is ideal for seasonal refreshes and multi-channel campaigns. Group images by background type and mark style for the most consistent results. Pixflux.AI supports handling multiple images in one session so you can quickly clean a set and move on to enhancement and export.
Does this work on complex backgrounds like fabric, brick, or hair?
Usually yes, with careful selection and a strong AI model. Complex textures require the algorithm to understand repeating patterns and light transitions. If a result looks off, re-run the cleanup on a smaller selection or refine just the artifact area for a seamless finish.
What if the watermark covers a large area of the subject?
It can still be fixed, but expect more careful passes. For large, semi-transparent diagonals or marks across key details, try multiple targeted removals rather than one big selection. You can then enhance contrast and micro-detail to restore realism.
Can I export for Instagram, TikTok, and web banners after cleanup?
Yes, just crop and export to each platform’s recommended aspect ratios and file sizes. After removing the watermark, prepare channel-ready crops (1:1, 4:5, 9:16, etc.) and check safe margins for text overlays. Keep an eye on compression to avoid banding in gradients and low-light areas.
Will it help with other distractions like wires, dust, or stray objects?
Yes, AI object removal can clear many non-watermark distractions efficiently. After you remove the watermark, use the same workflow to delete small clutter, loose wires, or paper creases so the subject remains the focus.
Is there a quick way to enhance the cleaned images?
Yes, an AI photo enhancer can sharpen detail and balance contrast in one pass. Tools like Pixflux.AI can refine clarity, reduce noise, and keep colors faithful post-cleanup. Apply light adjustments first; if you push too far, skin tones or brand colors may drift.
Conclusion and next steps
Refreshing owned visuals is one of the fastest ways to ship more—and better—creative without restarting production. Start with rights-first checks, clean outdated labels and proofs, run a tight QC pass, and then enhance for platform-ready delivery. If you want a fast, creator-friendly workflow, try a dedicated photo watermark removal tool to turn your archive into a high-performing, on-brand library.
Ready to repurpose at scale? Pixflux.AI makes it easy to clear old promo tags, remove proofs, enhance clarity, and finalize backgrounds—so you can publish sooner and iterate faster. Explore how to remove watermarks from images and start shipping refreshed campaigns today.


